7 Ways to Tell If Hail Damage Is Hiding Something Serious
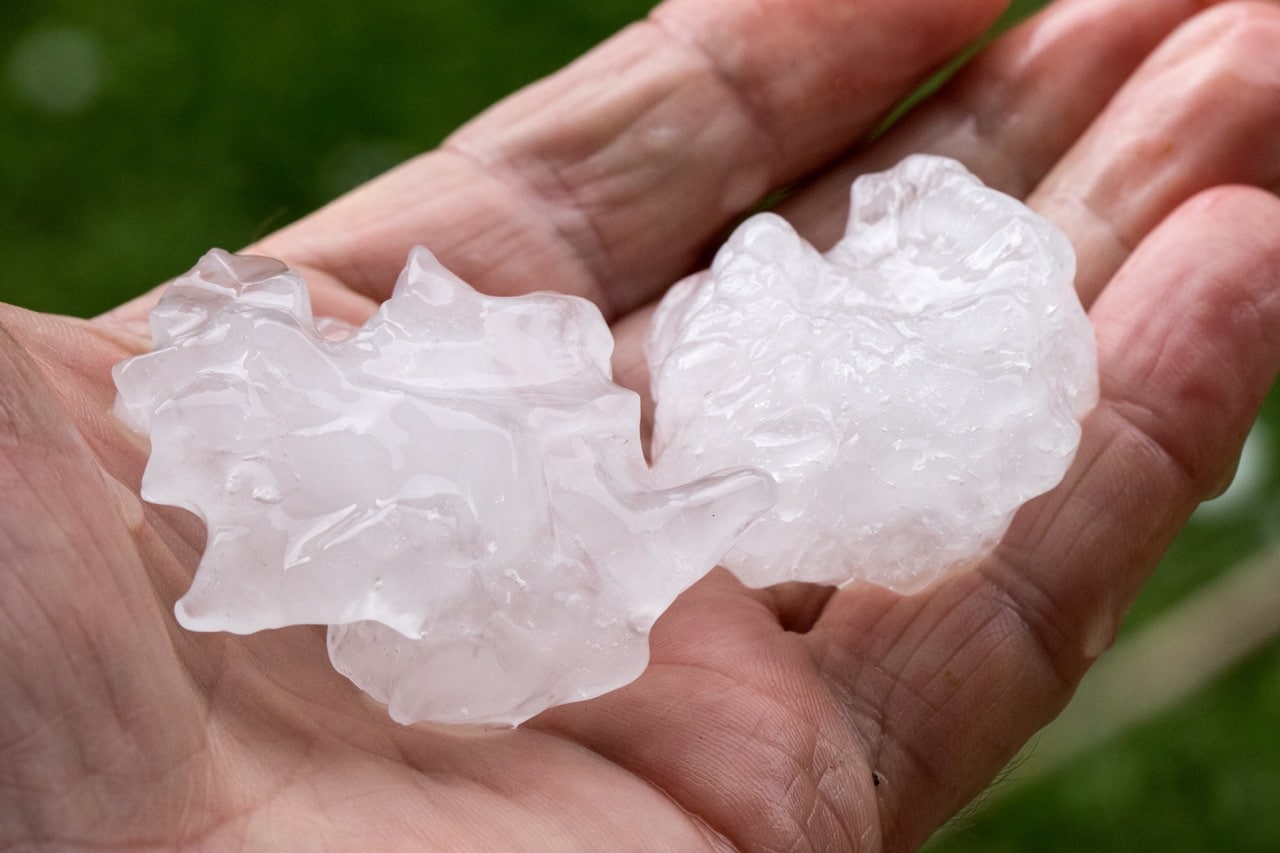
You’ve just ridden out another hailstorm and now that the sky’s clear, you’re standing beside your caravan or motorhome, scanning for damage. Maybe you’ve noticed a lot of hail damage. Or maybe you think everything looks fine — maybe a few marks here and there. Nothing serious… right?
That’s what most owners think. But hail damage is tricky. What looks like a few harmless dimples can hide deep cracks, loosened seals, and leaks waiting to happen. The truth is, the worst damage isn’t always visible … it’s the kind that slowly seeps in, warping panels, feeding mould, and turning into expensive insurance battles down the line.
After 50 years repairing caravans, RVs, and motorhomes across SE Qld, we’ve seen it time and again … storms pass, owners relax, and weeks later the real cost shows up.
In this guide, you’ll learn exactly how to inspect your caravan or RV for hail damage the right way … where to look, what to feel for, and how to protect both your van and your insurance claim before small problems become major ones.
Step 1: Check the Roof and Exterior Panels
Your roof and upper walls take the brunt of every hailstorm. Even small stones can leave micro-dents or flex the panels just enough to create future leaks.
What to do
Inspect all sides and the roof in bright daylight or use a torch at a low angle.
Run your hand along the panels — you’ll often feel damage before you see it.
Look for dents, dimples, cracked fibreglass, or lifted seals.
Older aluminium caravans are most at risk. Their seams can warp over time, pulling the sealant apart and inviting water in … the kind of “hidden ingress” that quietly costs thousands later.
Hail doesn’t discriminate, unfortunately. It hits everything. That includes your skylights, solar panels, vents, and A/C shrouds. In fact, roof-mounted gear like air conditioners, skylights and vents are often the first areas to be affected.
What to check
Windows & skylights: look for spider cracks or warped edges.
Roof accessories: inspect solar panels, antennas, vents, and air-conditioning covers.
Sealants & flashings: hairline splits are the start of major leaks.
Even if it all looks fine, UV exposure can widen micro-cracks over the weeks that follow.
Step 3: Check Weather-Seals & Water Ingress Risk
Once hail opens up a seal, moisture sneaks in — and that’s when delamination, rot, and mould begin.
Look for:
Seals around windows, doors, and roof joints pulling away.
If you’re unsure, use a moisture meter or book a professional leak test. It’s one of the best investments you’ll ever make in your van’s lifespan.
Step 4: Understand the Structural & Resale Impact
Even if your van’s bones are fine, visible dents hit you where it hurts — the resale.
Here’s what that means:
Insurance payout: Minor dents might not exceed your excess.
Resale value: Obvious hail marks can knock 10–30 % off the price.
Long-term wear: Repeated hits can loosen framing and roof battens.
Step 5: Your Repair Options (and What They Cost)
Repair Type
Best For
Cost (AUD)
Notes
Panel Replacement
Aluminium walls
$2,000 – $8,000
Most common fix
Paintless Dent Repair (PDR)
Fibreglass / composite
$500 – $2,500
Only if panels aren’t cracked
Full Roof Replacement
Major hail / leaks
$5,000 – $15,000
Usually an insurance job
Always go with a certified caravan repairer — not a car panel shop. Caravan roofs and walls have their own structural systems that need specialised tools and sealants.
Step 6: Handling the Insurance Side Like a Pro
Hail claims can get messy … but if you document well, they don’t have to.
Just follow these steps:
Take clear photos – wide shots and close-ups.
Record the date, time, and location of the storm.
Book an inspection with a caravan hail specialist like us here at All Brand Caravan Services.
Notify your insurer straight away. (Some insurers may decline late claims, arguing that the damage got worse afterward).
If your van has been written off, ask about agreed value payouts (if your policy allows) — market value rarely covers upgrades and extras.
Step 7: How to Prevent Hail Damage Next Time
You can’t stop storms, but you can outsmart them. Here are some quick tips to help prevent hail damage in the future.
Park under cover whenever possible … even a service-station canopy helps.
Use a hail-resistant cover with multi-layer foam protection.
Watch the BOM Weather app for alerts.
Reseal joints and check your roof twice a year.
In hail-prone areas like Queensland, consider roof mats or portable shade structures.
Final Thoughts: Small Dents, Big Consequences
Inspecting your caravan after hail isn’t a five-minute job …it’s a genuine safety check. Ignoring the subtle stuff can lead to:
Water ingress and mould
Warped framing
Lost resale value
Denied insurance claims
Be proactive. Take your time. And if you’re unsure, get a professional hail assessment. Because in the caravan world, what you can’t see can cost you the most.
Need Expert Help?
A little damage doesn’t have to derail your plans. With expert help, most hail, storm, or road-related issues can be resolved quickly and reliably. At AllBrand Caravan Services, we help you get back on track—whether you’re just starting out or in the middle of your touring holiday.
Embarking on a caravanning adventure is a fantastic way to explore Australia’s diverse landscapes. We know that we’re incredibly lucky to live in such a beautiful country, and I’m sure…
Why Sanitise – To keep your water clean, your trip stress-free, and your health protected There’s nothing better than hitting the road in your caravan and knowing you have everything…